I walk my garden every day. Several times. Weather does not deter me. So, I like to think I have a pretty good idea of what's going on in my garden, more or less, at any given time. But apparently this is yet another example of the human ability to delude oneself.
Today, as I was checking in on the original bean bed, I glanced over to the grape trellis and noticed the grapes are filling out nicely. I stepped over for a closer look.
See? Grapes. Plump and round, just like they're supposed to be. But what's that behind the grapes?
It's the nest of one clever bird! I'm sorry to report that I don't know who built this. I imagine whoever it was is probably done with it by now. But perhaps they'll be back sometime since they managed to find such prime real estate. This nest was built straddling the wooden top rail of the grape trellis. No shaking or weaving and bobbing in the wind. It is surrounded by grapes, which means the bugs come right to whoever is sitting on the nest. Plus, the giant grape leaves both shelter this nest and collect water right at the front door. I'm totally impressed! I have walked past this nest everyday- probably for months!- and had no idea it was there. Nature wins again!
In honor of National Pollinator Week (who knew? but, yay!), Horticulture magazine included in today's email a link to free pollinator guides customized by your zip code (US). Funded by a variety of organizations and provided by the Pollinator Partnership, these guides are pretty slick. I have not read through mine with a fine tooth comb (yet), but on first glance would say it provides a comprehensive basic introduction to who is a pollinator (they're not all insects!) and planting for pollinators. It appears comprehensive in that it covers a lot of ground, but basic in that it does not go into so much depth as to lose a new gardener's attention. There are also some nice charts that break down what is blooming when and who benefits from it. One caveat: When I plugged in my zip code, it took me to the "simple map" view. There is also an interactive map view. My location is right on the edge of a zone change. So, check to see how close you lie to a zone change. If you are very close to the break like I am, it may be worthwhile to download the guides for both zones. Click HERE to go to pollinator.org and download your free pollinator guide.
By rights, all I should be doing right now is studying for the exams I have tomorrow. Instead, I went into the yard this morning with the dogs. From the window, I had seen it blooming, and I just had to get a close-up view. Had to.
This gorgeous yellow flower is the lone Russian Red Kale that survived the winter in my garden. In the fall, I was so busy with school... parenting... surviving... that I never cleaned up the garden for winter. When the snow hit, the garden was a wreck. Completely overgrown. *Sigh* I figured I would take care of things in the spring. But the spring semester has been even crazier than the fall and it hasn't happened.
Several weeks ago, however, I took a wrong turn in the yard and ended up staring a monster of a kale plant right in the face. Literally. The trunk on this thing is thicker than my drinking glasses. At that point, it had put out lots of new growth and was just starting to think about flowering. Free food! Exactly when there was nothing fresh locally, too. I pinched back it's first flower foray and harvested a surprising quantity of leaves. And then another. But eventually, it seemed cruel and pointless to stop this plant from flowering. It really wanted to. It was supposed to. And if it did, there would be more kale plants. So I left it alone to do its thing- and it has. It's beautiful. The trunk, stems, and leaf veins are purple, the leaves green, and the flowers this cheerful yellow. It's such a pretty plant that it left me wondering where I could use it in a flower border. Seriously. It's that pretty. And hey, people use those ugly, stinky ornamental cabbages- so why not kale?
But the kale wasn't all I found in the garden today. I also found an army or lettuce. Seriously. Check out the formation to the left. The solid green is Amish Deer Tongue, and the speckled is Forellenschluss (aka Speckled Trout Back, etc). Or perhaps I should say, that's what they were last year. Because I was not paying attention, I do not know if the lettuces flowered at the same time. They may be hybrids; or not. At this point, I don't care. I have an entire bed of lettuce growing, for which I did exactly nothing. In addition to these two, I've found exactly one head of this lovely (but poorly photographed) lettuce. I don't remember it's name, but will have to look it up and plant some more. It is really pretty! As you can imagine, I was thrilled so much lettuce going strong in the garden with no effort from me. But the bounty didn't
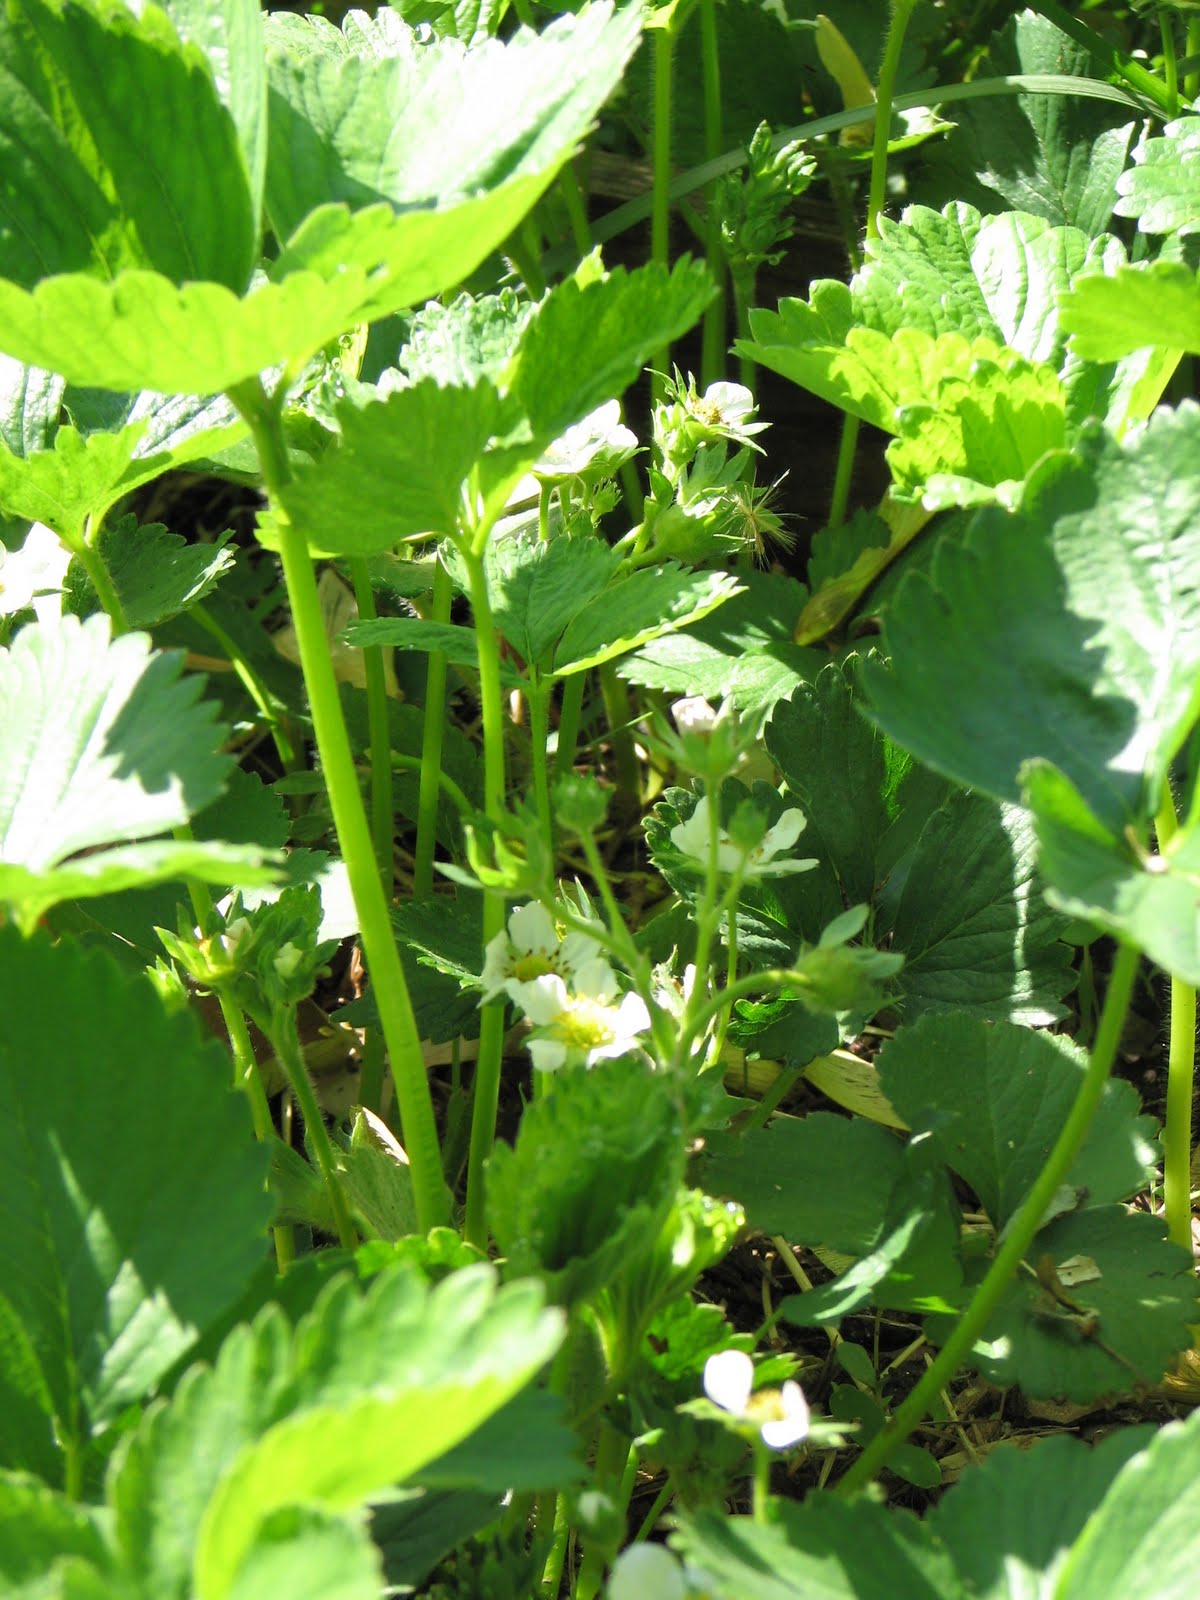
end there. The grapes that came with the property, whose trellis was all but obliterated by the series of storms over the winter, are leafing out. I haven't told them, but I've been thinking about pulling them out, rebuilding a stronger, better trellis, and planting grapes we actually like. The strawberry bed I put in last year is going like crazy. Apparently strawberries enjoy a certain degree of neglect because I have never seen strawberry plants this big. There are weeds everywhere, and still these plants make every effort to do what they are designed to do. If I remember to cover the strawberry bed to keep out the birds, it looks like we should have a bumper crop this year. How awesome is that? But wait, there's more! Despite my best effort to clean all the potatoes out of
the bed last year, one potato plant has come up. At this point, I'm inclined to leave it be for now and see what happens. You're not really *supposed* to do that- in order to prevent diseases from building up in the soil. But what the heck- let's live a little!
Then there's the chard, in red and yellow, and the corn salad that have seeded freely. And the hop vine running towards the sun. And the onions that didn't get pulled last year, but which I tried to pull early this spring and then gave up on because they were uber slimy, they are looking lovely as they prepare to go to seed.
As a gardener, and especially as a master gardener, I should be ashamed of myself for letting my garden fall into such a state. But as a real person with real responsibilities that have to come before the garden, I have to acknowledge that things happen. Usually, though, when "things happen" they don't result in free food sans work! Seeing the unplanned, yet very welcome, bounty in the garden- and the sheer beauty of some of these plants when allowed to go full cirlce,
has me thinking a lot about how and why we relegate food plants
to a garden of their own. Many plants from the food garden would be truly lovely mixed in with ornamentals. How about a walkway lined with gorgeous lettuce? Or kale as the backdrop to flowers? Onions provide interesting structural elements and the cool flowers common to all alliums. Strawberries might make a fun groundcover. Edible landscaping is not a new idea. But I'm not sure why its not more popular. I'm guessing people have just never seen the possibilities open to them. But it's worth having a good think over, because the potential exists to produce a lot of food without giving up the interest and decorative value of traditional landscape plants. Do you have an edible landscape? I would love to hear how you incorporate food with fun in your garden.
This week has been kind of crazy here. The whole thing sort of flew by me, with me thinking I was “failing” the final week of the 28-Day Real Food Challenge hosted by Jenny at Nourished Kitchen. But somehow, I actually did alright this week.
Day 22 was about choosing and preparing meat. My struggle to find grass-fed meat I can afford to buy has been a theme running through this whole challenge for me. As a result, I’ve scaled back how much meat I serve here in order to purchase meat in line with my ethics. I’ve developed the habit of always watching for a new source of grass-fed meat or a better price. And while I had never really had trouble preparing grass-fed beef, bison was a whole other matter. Last night, after much fretting and hovering with a thermometer, I prepared that much anticipated bison steak to near perfection. For me, eating meat with that much pink inside will take a little adjustment. But The Girl declared it delicious and everybody finished their serving. Progress! I tried to get a picture, but naturally, my camera told me to change the batteries and I decided to eat instead.
The animal proteins theme continued on Day 23 with a discussion of pork, poultry, and eggs from sources raised in accordance with the natural proclivities of pigs and chickens, which means access to grass, bugs, worms, etc. I’ve been buying pastured eggs and bacon for several weeks now and adore them. They’ve become my standard breakfast. I’ve struggled more than a little bit with the price of pastured poultry, but am slowly coming around. Pork is not really an issue here because, aside from my morning bacon, nobody here actually likes pork. However, if I have a chance to buy pastured-lard, I will give it a try.
Day 24 was all about preparing and using stocks and broths. This is where I really shined this week! I prepared both beef and chicken stocks, jarred them, and tucked them into the fridge for easy access. I am still learning all the ways to use them. But with one or two notable exceptions, nobody has complained about the foods I’ve prepared with them. I love the richness homemade stock adds to foods. Love it.
I was both looking forward to and dreading Day 25 and its discussion of offal. I don’t have much to report here. The Girl told me in unambiguous terms that she does not want to eat organ meats. I didn’t even have to ask The Boy. Honestly, I’m not thrilled about it either. But I have not given up hope. I need the right “entry” to this food group. I did include the miscellaneous chicken bits in the pot when I made stock. But that’s my only offal foray so far. I’ll experiment on myself when the kids visit their dad. Unless the smell drives me out of the kitchen.
Day 26 highlighted fish and seafood. I already was incorporating these into our diet, but was plagued by confusion over what is safe and what isn’t, what is sustainably/ethically harvested and what isn’t. I really, really appreciate the Seafood Watch guide to help me navigate this area.
Our assignment for Day 27 was to figure out how we can give back to the real foods movement. This assignment arrived the same day The Girl came home from a friend’s house and informed me she’d “schooled the neighbors” in real foods. Go Girl! As a Master Gardener, I already volunteer in my community helping people learn how to grow their own food. I’d like to also incorporate into my blog more resources for beginner gardeners who want to grow some of their own food. We also share resources we’ve come across, like Food Inc., with pretty much anyone. It makes a difference. For instance, after we watched that movie, I told my parents to watch it. They did, and have made a number of significant changes in their purchasing habits. They’ve also continued encouraging others to watch the movie.
Finally, Day 28 is about looking forward. I fully intend to continue buying and eating in line with all that I’ve learned during the last 28 days. I had made the commitment to change how we eat just before I stumbled, accidentally, onto the 28-Day Real Food Challenge just as it was beginning. I owe Sara at Plays Well With Butter for pointing me to this challenge. Thanks Sara! I’m so glad I joined! I have plenty to learn still and plenty of room for improvement. But I have also progressed more than I would have without this challenge to guide, support, and nudge me. Thanks Jenny!
Looking forward, things I plan to work on include planning ahead and perfecting my sourdough bread. We've cut way down on the amount of grain in our diet primarily because to do them right requires more work than I can muster. I'd like to add a little bit back. I still haven't made the sauerkraut I've been looking forward to, and I goofed with the cultured veggies I did make. After they started to discolor at the top of the jar, I decided to toss them. After spooning all but the last spoonful into the garbage disposal, I decided to have a tiny taste. It was good, and I wasted it! Note to self: patience really is a virtue. And then there's offal, which I'm working up to. Really. Check back and see.
For our purposes here, there are three main points to cover about soil testing: how to do it, why to do it, and how to use the test results? We’ll tackle how first.
How do I soil test?
You may have seen home soil testing kits in your local garden center. The quality, reliability, and breadth of these kits can vary widely; so to have confidence in the accuracy of your results, why not let a professional testing lab handle the test for the same money? A web search or call to your local extension office will turn up several lab possibilities. But be sure to compare the specifics of each option. Fees vary, as do actual services performed. For example the labs recommended in my area charge anywhere from $5 to $18 and the specific nutrients tested for vary, but not necessarily in correlation to price! Your extension office may have a handout detailing the specifics of labs in your area.
In order to have your soil tested by a lab, you need to send them a sample. There is a “right way” to do this. When you’ve settled on which lab you’ll use, download any forms you need from the lab website and check to see if the lab or your extension office provides a sample bag. If not, you’ll need a zip lock bag.
To collect the soil sample, follow the instructions your lab provides. But the basic process looks something like this… Dig a slice of soil (plunge the shovel 6-8” into the soil, lift out, set the shovel close behind the cut and plunge in again) from several spots in the area you intend to plant. Mix the soil from all the slices together in a clean bucket, leaving out rocks, plant material, and other debris. Mix it really well so the sample you send the lab really represents the whole area you plan to use. Once the soil is well mixed, measure out about a cup and a half of soil. It should not be wet! If the soil feels like it’s got a lot of moisture in it, spread your sample on a plate to air-dry a bit before packaging it (don’t bake it). If the sample is dry, go ahead and pour it into either the sample bag you were provided or your zip lock bag. Seal the bag and follow the packaging and mailing directions on the form provided by the lab, but be sure to indicate on the lab form that the area you are testing will be a food garden. The recommendations you receive back could be very different if the lab thinks you are testing a lawn.
A short while after sending off your soil sample, you will receive back a report from the lab. Some lab reports are gussied up with colorful charts, but most look like something out of, well, a…laboratory (ahem). To the uninitiated, soil reports can seem as if they require a Chemistry degree to decipher; but honestly, they’re not that complicated.
Different labs may convey the information slightly differently. But all the reports will tell you about the levels of plant-available nutrients in your soils, provide amendment suggestions, and indicate your soil pH. Many will also tell you the level of organic matter in the soil sample, but some laboratories charge extra for this, so make sure you check this before sending in your sample. There may be other information in the report; but for beginners, the nutrient levels, pH, and organic matter readings are probably enough to tackle. Don’t be shocked if your report indicates that your soil sample contained only about 5% organic matter- this is about average. If your sample tests much lower than that, you’ll know you need to beef it up a bit.
Why should I soil test?
Your soil test report provides crucial information about the ability of your soil to support healthy plant growth. As mentioned in the first installment of this series, most foods humans eat can be traced back to the soil one way or another. Healthy soil produces healthy plants. The benefits continue passing along up the food chain. As a gardener growing some of your own food, you have a prime opportunity to make sure that your food comes from the healthiest soil possible. Your soil report provides lots of information to help you in that quest.
How do I use the test results?
Amendments
The amendment recommendations for your soil that you receive in your soil report are based upon the sample you sent in and the assumption that you will be growing a food garden. The recommendations will be presented as a number of pounds per thousand square feet. In order to correctly amend your soil, you will need to determine how many square feet of growing area you will be amending. If your plot is roughly square or rectangular, you can multiply the length measurement by the width measurement and be done with it. Other shapes will require a little more work to calculate.
As an example, let’s assume your garden plot is 20 feet by 20 feet. That’s a total of 400 square feet. That’s only 40% of the 1000 square feet your amendment recommendations are based upon. So, to figure how much you should apply to your plot, multiply the amount recommended in your report by 40%. To illustrate, if your report recommends 6.0 pounds of potash, that’s really 6 pounds per thousand square feet. For your 20x20 plot, you’ll only need 2.4 pounds. But remember, your results are based on the size of your plot. If your plot is 840 square feet, that’s 84% of the 1000 square feet; if it’s 620 square feet, that’s 62%.
Once you know how much of a recommended amendment to use on your garden space, you need to decide how you want to apply it. Commercial fertilizers, synthetic or organic, are widely available but are not the only options. A little independent research is in order here to ensure the product you choose is in keeping with your ethical framework.
pH
It is important to understand that pH is a logarithmic and not linear measurement scale. In order to understand it, however, we can compare it to a standard number line of equally spaced marks with the center mark numbered zero, marks to the right of zero numbered in positive increments of one, and marks to the left of zero numbered in negative increments of one ( …,-2, -1, 0, 1, 2…). On our pH number line, we’ll use the same equally spaced marks; however, our center mark is numbered 7 and represents a neutral condition. The numbers to the left and right of 7 decrease or increase by one as on a standard number line, but they represent exponential changes in acidity or alkalinity. Numbers lower than 7 represent relative acidity, while number higher than 7 represent relative alkalinity. To illustrate the degrees of change, we can consider some common materials. If we compare baking soda solution, which has a pH of 8.4, with milk of magnesia, which has a pH of 10.5, what we need to understand is that we’re not really talking about a (more or less) “two point change.” The difference in alkalinity between the two is far more significant. Milk of magnesia is roughly one hundred times more alkaline than is the baking soda solution. If we then compare our baking soda solution (pH 8.4) with common vinegar (pH 2.4), the “six point” difference actually indicates that vinegar is one million times more acidic than the baking soda solution.
Different plants have different preferences with regard to pH; however, most garden crops are happy in the 6.0-7.0 range. Some notable exceptions are found among berries: blueberries prefer 4.0-5.0, blackberries 5.0-6.0, and black raspberries 5.0-6.5. So if you plan to grow berries, consider setting aside space for them outside your regular garden plot.
Soil pH has a lot to do with where you live. For example, much of the Mid-Atlantic has acidic soil, while areas such as Arizona and Utah tend to be alkaline. Reducing acidity is a fairly simple matter of applying agricultural lime. Your soil report will indicate an appropriate amount of lime to use, but remember that it will be expressed as pounds per thousand square feet and do the conversion to determine the actual amount for your plot. Alkaline soil is a little trickier to amend. Alkaline soils often have some limiting factor that needs to be addressed with more care than can be addressed here. If you find yourself with alkaline soil, consult the local extension office or a reliable local nursery for advice.
The importance of pH to gardeners is really twofold. The plants’ preferences are important. But pH also affects nutrient availability. As luck would have it, the same 6.0-7.0 range in which most vegetable patch plants thrive happens to also be the range at which most soil nutrients are most available. Pretty smart plants, huh?
Organic Matter
We discussed the types of matter that make up organic matter in the first article of this series, which you can find here. We will discuss the form that is perhaps most familiar to gardeners, compost, in more depth in the next article in this series- so we won’t go into it now.
Stay tuned… Next up will be compost and composting…
This is the first in a series of articles I am developing on the gardening aspects of real food. These articles are the abbreviated version of what may become an ebook. If you might be interested in such an ebook, please email me here and I'll let you know when it's available.
Soil
Food plants grow in soil. Understanding what soil is and how it contributes to food is important for anyone who eats, and especially important for anyone who endeavors to eat real food.
What is soil?
For the purposes of this article, we’re really talking about topsoil. Topsoil is a mix of solids, liquids, and gases in the form of minerals, organic matter, water, and air. The composition of topsoil changes constantly. Water runs in and out and evaporates. Organic matter breaks down and is used up. Healthy topsoil is dynamic.
In addition to these basic ingredients, topsoil is home to vast numbers of living organisms. Some such as moles, earthworms, and insect larvae, are easy to see with the naked eye. But most of the organisms in soil are microorganisms. They include organisms such as fungi, bacteria, and nematodes.
We’ll learn more about the organic aspects of soil when we get to the Compost article. But in the mean time, it is important to understand that all the parts of the soil serve special functions. If you consider the question “Which makes music, the musician or the instrument?” you’ll see that it’s not one or the other- they must work together to make music. I hope to show you how healthy soil is similar. Healthy plants are the product of healthy soils where all the parts are working together.
Soil solids
Soil solids include both mineral and organic matter. They provide the bulk of soil and the medium that holds water and air where plant roots can reach them.
Mineral solids include rocks, sand, silt, and clay and makes up roughly 45% of optimal topsoil. A soil’s texture describes the proportion of specific mineral solids in the soil.
Soil that is predominantly clay is often referred to as “heavy” soil. These soils retain a lot of water and are generally high in nutrients. However, the particles are packed close together leaving little room for air. Clay soils feel slippery or sticky when wet and can bake solid, and even crack, when dry. Amending clay soils will improve water drainage, allow for better root penetration, and improve the soil’s ability to support microorganisms.
The “solution” to clay-heavy soil is to add composted organic matter. Recommended amounts range from 3-8” inches deep across the surface area you intend to plant. This composted material should be dug or tilled into the top several inches of soil; however, going deeper than a shovel’s depth is not necessary.
Soil that is predominantly sand feels gritty and has low water- and nutrient-holding capacities. Sandy soil has the opposite problem from clay soil in that the spaces between the sand grains are too large, allowing water to drain away too quickly and offering little stability or nourishment for plant roots. Amending sandy soils will improve water retention and increase nutrient content.
The solution to sand-heavy soil is the same as for clay-heavy soil: composted organic matter. However, because sandy soil has little nutritive value of its own and poor particle adherence, a greater quantity of compost must be added over a longer period of time. Planning to incorporate a 2-3” depth of compost across the surface area you intend to garden, applied 3-4 times a couple weeks apart might be a good guide. It’s a lot of work up front; but after the initial garden building, maintenance should be pretty simple and pain-free.
Silty soil feels silky like fine ground powder or flour when dry and slippery when wet. Similar to clay soils, silty soil has small pore size and poor drainage. On the soil particle size spectrum, silt tends to fall between the super small size of clay particles and the relatively large size of sand particles. Silty soils are improved by the addition of compost; however, smaller quantities are generally needed than for either clay or sandy soils.
Organic matter soil solids include humus, biomass, and residues and by-products. Humus is organic matter that has completed the composting process and become stable. It is a complex and not yet fully understood substance, yet is vitally important to both soil structure and health. One primary function of humus is water retention. Biomass refers to the living aspect of soil and includes creatures ranging in size from microscopic bacteria to soil-dwelling vertebrates such as moles. The organisms that comprise biomass are responsible for breaking down residues and improving soil structure by creating tunnels that allow water movement and oxygen transport underground. Residues include un-decomposed dead plant material and creature corpses. By-products are substances that some plants and soil creatures release into the soil. Residues and by-products provide nutrients and energy to soil organisms and help hold soil particles together in clumps. Compost produced in the garden is often a combination of these components.
Gardeners rarely have soil composed of only clay, sand, or silt. However, the relative proportions of these materials suggest whether or not a particular garden site needs to be amended to provide better soil structure and if so how. Soil with a good mix of clay, sand, silt, and organic material is called loam. Loam is the gardener’s goal.
Soil liquids
The liquid component of soil is called the soil solution and is composed of water and dissolved materials. The soil solution is where plants obtain nutrients. An important aspect of soil solution is pH.
pH is a scale from 0 to 14 that indicates whether a soil solution is neutral, acidic, or basic (alkaline). A neutral pH reading is 7. Acidic readings are less than 7, while basic readings are greater than 7. Most garden vegetables prefer a pH between 5.5 and 7.5, but it’s a good idea to consult a pH chart regarding the specific plants you intend to grow because, to a plant, that two point spread is sometimes pretty significant. Home pH test kits are available, but pH is also tested as a part of a regular soil test which would also provide information about nutrient content, as well as amendment recommendations. Some garden centers, and all extension agencies, can either provide you with a soil test or help you get one.
Soil air
The air in soil is pretty similar to atmospheric air, with the exception that soil air contains a bit higher concentration of carbon dioxide and a very slightly lower concentration of oxygen. One of the main reasons for this difference is that the soil is teeming with living creatures that take in oxygen and release carbon dioxide. Because oxygen moves into the soil and carbon dioxide moves out of the soil through tiny pores, the exchange happens somewhat slower than the conversion taking place in the soil. Plants adapted to growing on well-drained soil also require oxygen for their roots to survive.
Why do I need to know this?
Gardeners need at least a basic understanding of the components and workings of the soil because soil is plants’ life support system and every change humans make to the soil affects the health and productivity of the soil and the organisms dependent upon it. Humans are one of those dependent organisms. Most foods humans eat can be traced back to the soil, with the partial exception of things like seafood (although it’s all connected, thanks to nifty things like the water cycle and erosion).
Next up… More on soil tests and composting…
This post is my entry for today's Fight Back Friday hosted by Food Renegade.
Here you'll find my notes and ramblings on my journey toward a happier, healthier relationship with food. Follow along as one mom and two teenagers move toward food sanity. We're traveling a road paved with good intentions, but very few dollars! Can we do it? Come along and find out.




 Posts


